Player Creation - Platformer Tutorial Part 2 - Godot
This is the second part of the tutorial creating platformer game on Godot Engine. In this tutorial, I will explain how to make player, from the basic node creation until moving. So let’s get started!
- Part 1 : Preparation
- Part 2 : Player Creation
- Part 3 : Player Creation 2
- Part 4 : Tilemap and Camera
- Part 5 : Player Animation
- Part 6 : Parallax Background and Level Bounds
- Part 7 : Character Controller and Enemy
Prepare the Node
Okay, now we will create a Player. First of all, create a new scene by clicking the Scene Menu at the top left toolbar, then select the New Scene. Now, new tab named as [empty] in the Scene View appears.
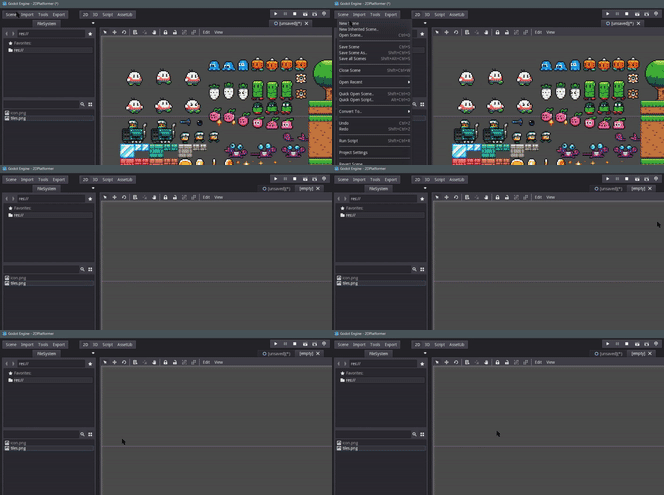
Create KinematicBody2D
Now go into Scene Window, create a new KinematicBody2D node, by clicking ‘+’ button and search KinematicBody2D, then double click it or click create button. Rename the KinematicBody2D to “Player”.
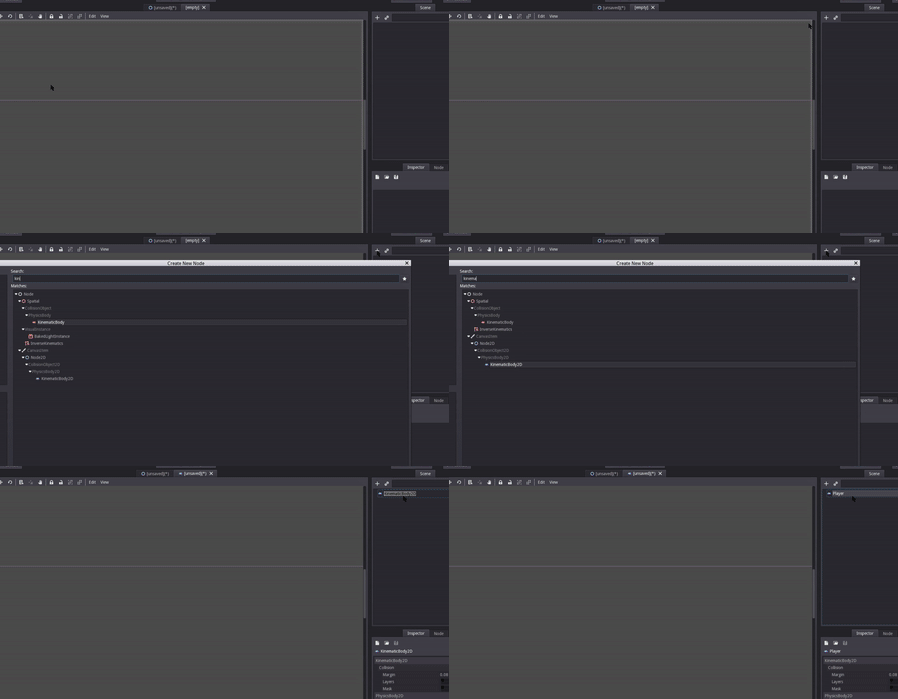
Create Sprite
Make sure Player Node has been selected, then create a Sprite Node by clicking the ‘+’ button, search Sprite and create it.
Now we need to assign the sprite image, select the Sprite Node, go to the Inspector Window, navigate into the Texture, click the
Sprite in Godot support for the tileset, so as you can see our image is a bunch of sprites with each tile size is 16px (for the character the size is 32px). Because our image size is 320px x 352px, so we need to set the VFrames 10 (320 / 32 = 10) and HFrames 11 (352 / 32 = 11). Divided by 32 because the character size is 32px x 32px.
Now save the Node by press Ctrl + S, save as Player.tscn. Now try to change the Frame by clicking the up and down button on the right side.

Doesn’t change anything?? Don’t panic, sometimes that happened. Make sure you have saved the Node, then close the Player Scene by clicking ‘x’ button at the tab Player, open again the Player.tscn from the FileSystem Window. Now try to change the Frame Value, now must be fixed.
Create CollisionShape2D
Next, create a new node by right click the Player Node, select Add Child Node, find the CollisionShape2D, and create it.
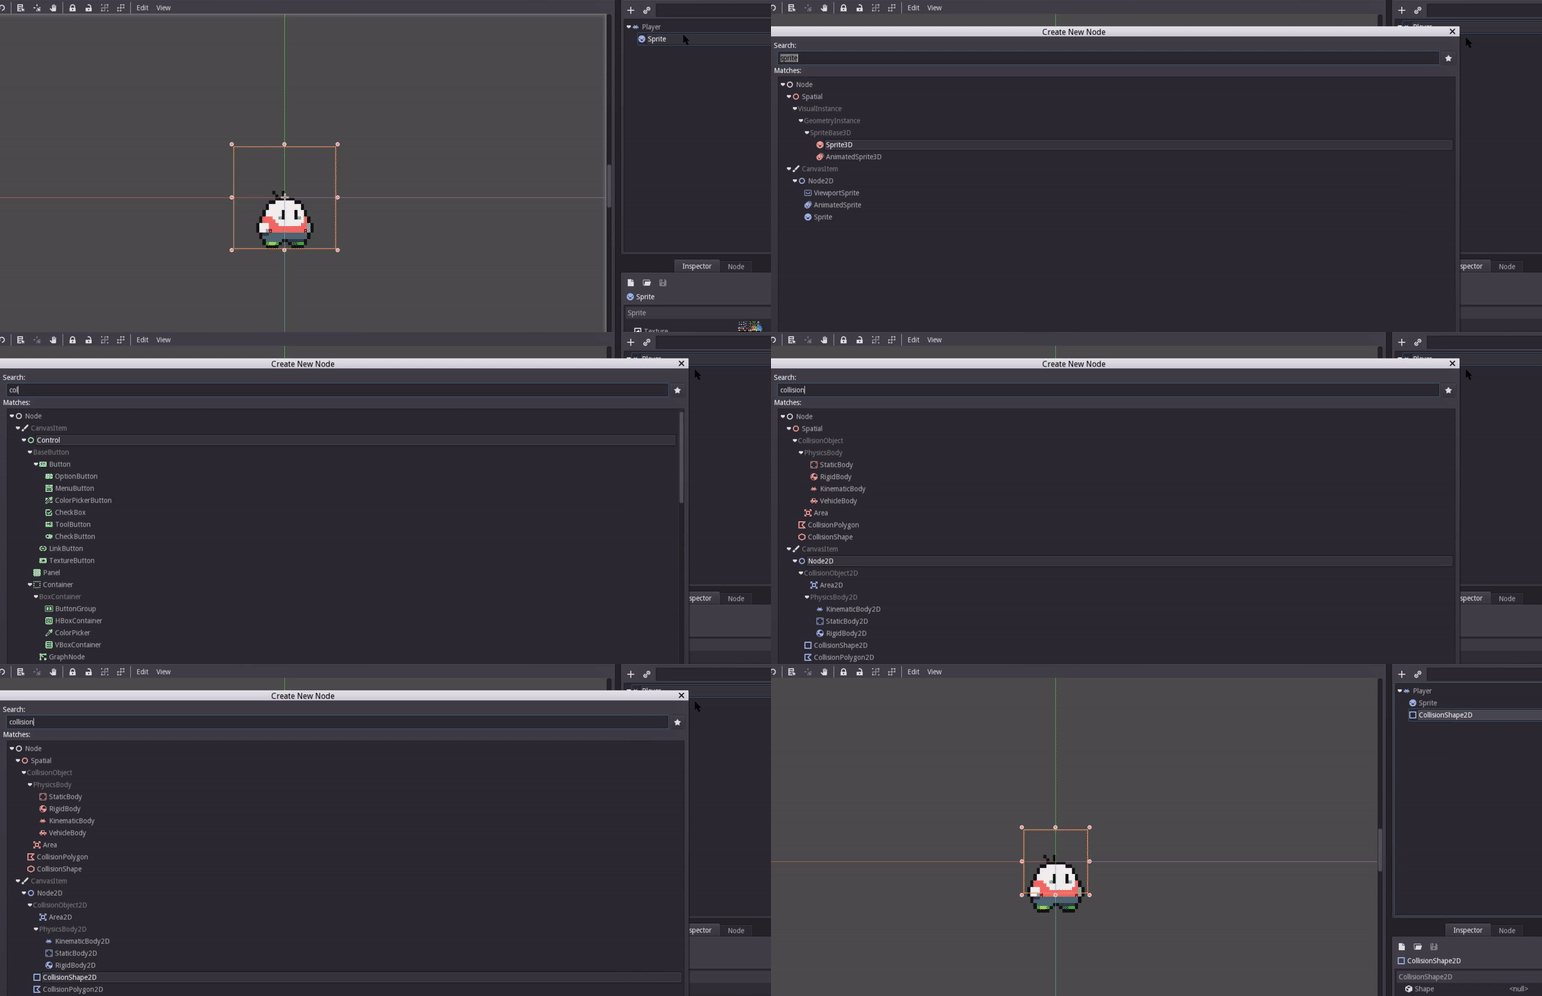
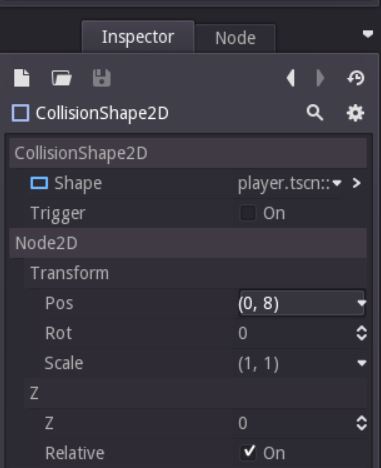
Select the CollisionShape2D and go to the Inspector View, navigate to Shape, click the
PRO TIPS : You can edit collision shape into precise value by activating the Snap Option. Click Edit - Use Snap, setup the snap value by clicking Edit - Configure Snap.
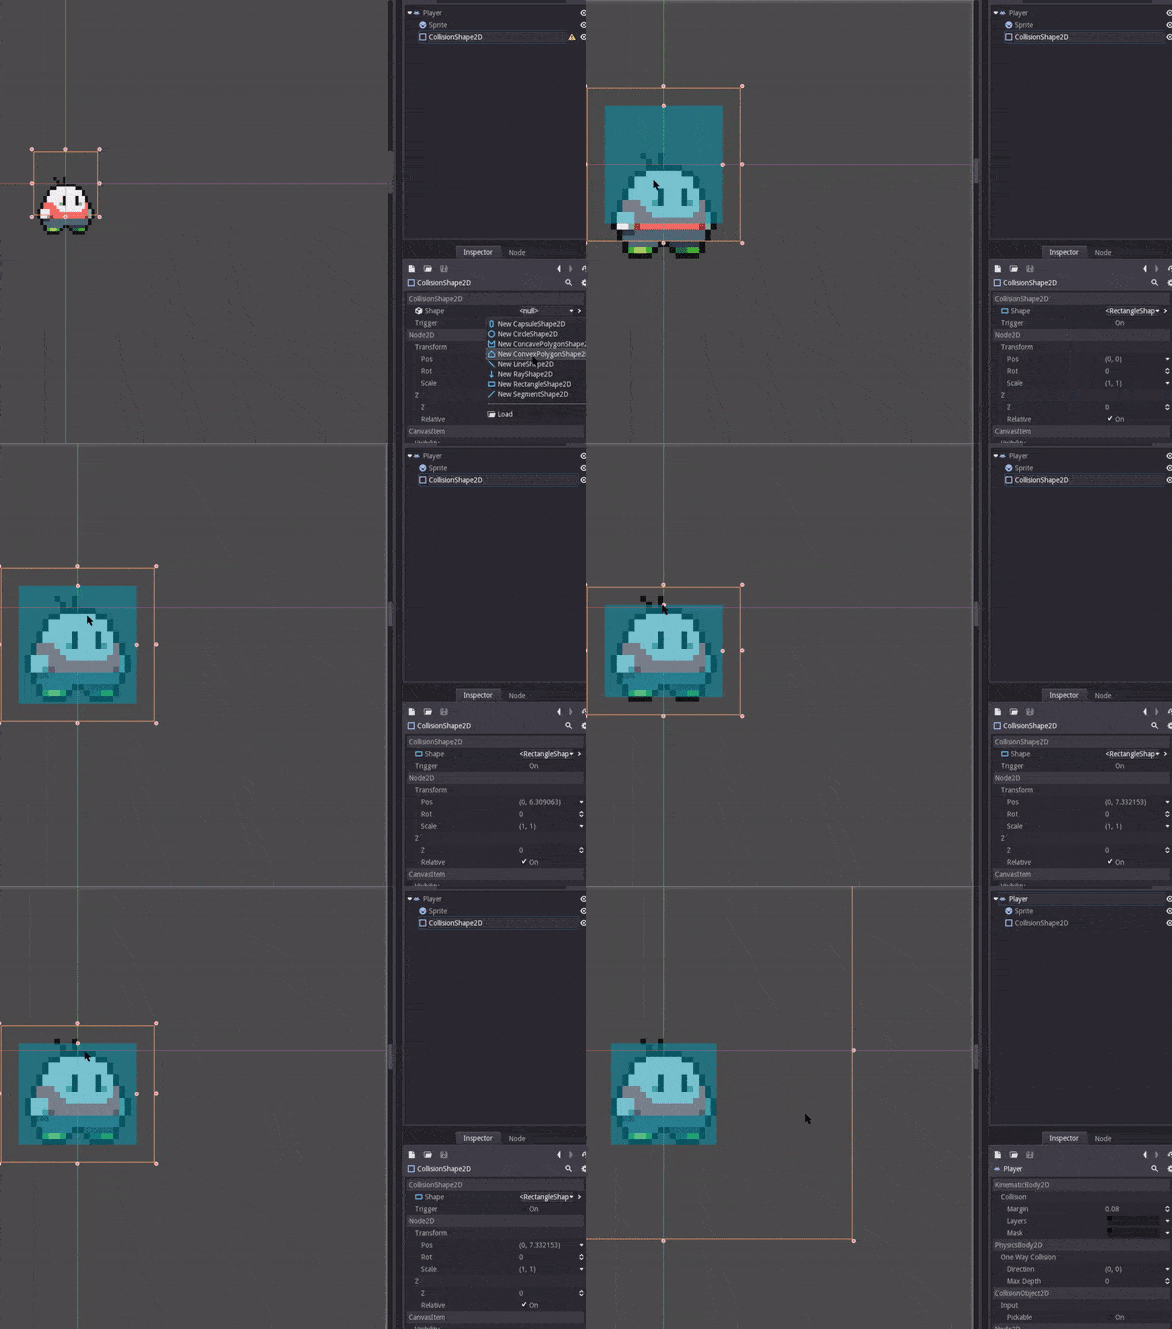
That was only the preparation, now the real challenge just BEGIN!!
Ready to become a Wizard?
Script is like a human brain. Without a script, node can’t make a decision what should they do. In Godot, we use GDScript for the scripting language. C# support will be available in the future. GDScript is easy to learn, so don’t let yourself down now, at least try it a bit. You don’t know until you try, right? I bet when Godot V3 released, you will love scripting with GDScript inside Godot Editor, much improvement, I’ve been tried it!! If you don’t know anything about GDScript, I recommend to learn from here!!!
So, back to the topic! Select Player node, see in the inspector, scroll into deep down, you will found Script, click the
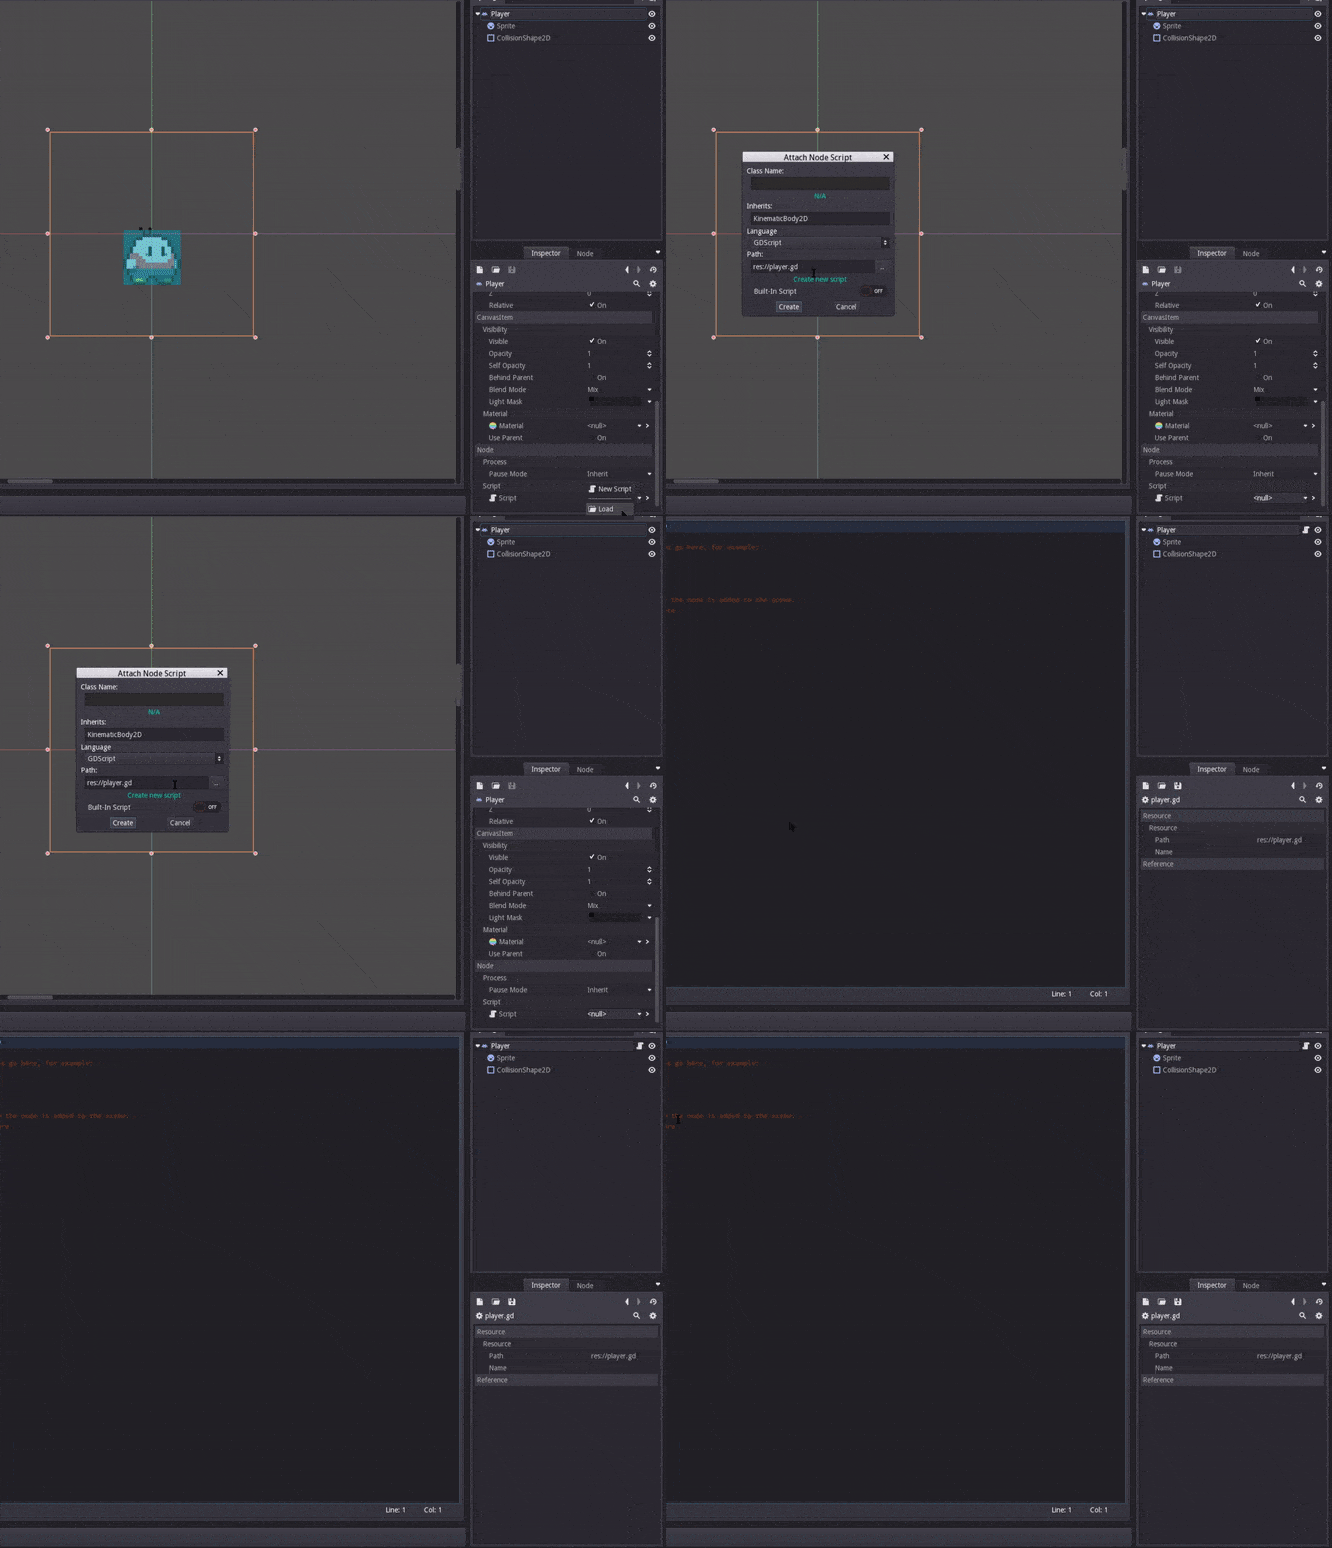
Now we need to write some code, follow my script from now, read the code for the explanation.
|
|
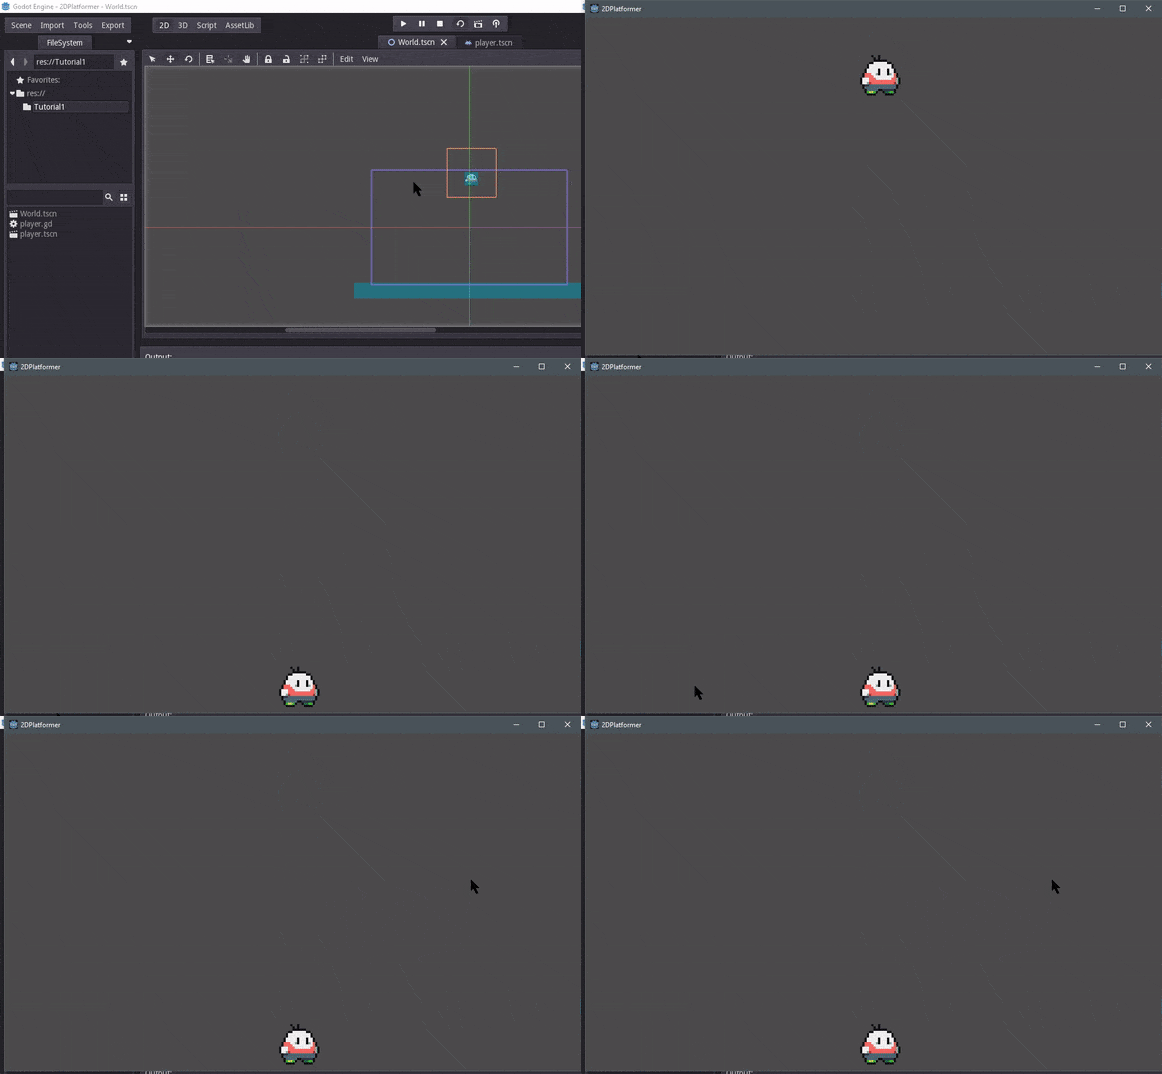
Press F6 to test it. Make sure the result is same as mine, the character will fall down. If your character just stays, or different as mine, there must be something wrong.

If you come from Unity, you must be wondering about GRAVITY. The Gravity value is positive, means the character must go up, not down. Yes, I once thought that way, but in Godot 2D, the vector y is opposite, so the down direction is positive and up direction is negative, got it?
Create the Test Scene
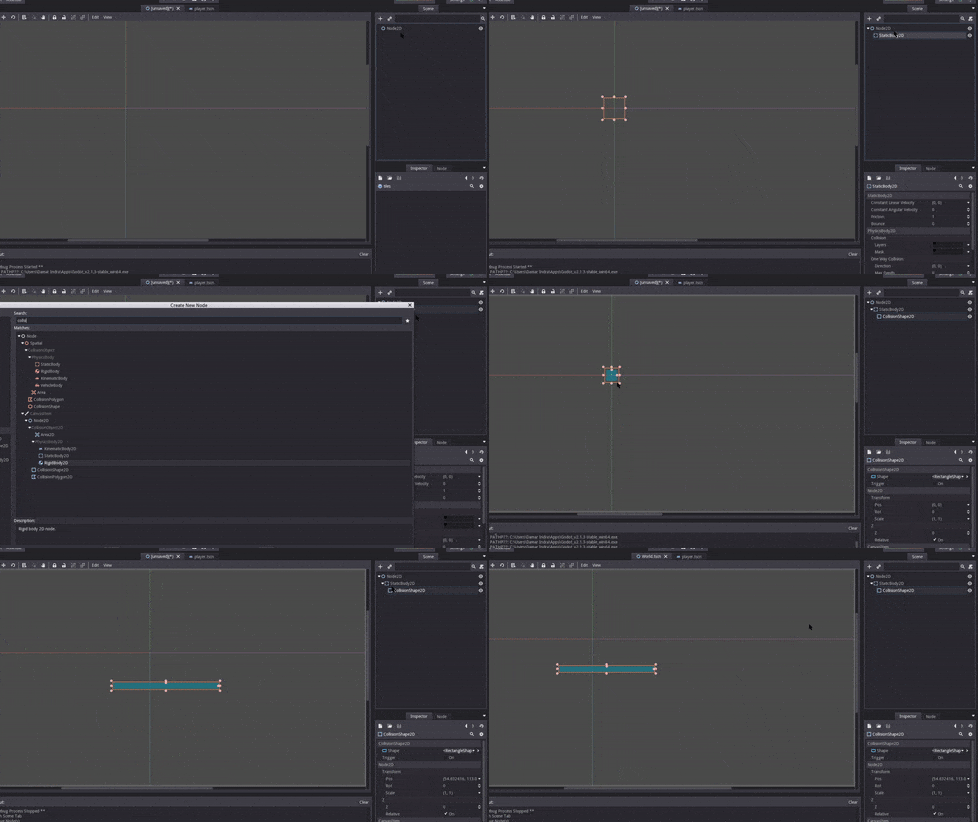
Create a new scene and add Node2D. After that, add StaticBody2D as a child of Node2D. Then add CollisionShape2D as a child of StaticBody2D. StaticBody2D is container for non-moveable CollisionShape2D (ex: ground), more about physics. Now Create the new RectangleShape2D of the CollisionShape2D, resize and move it. Save it as World.tscn.
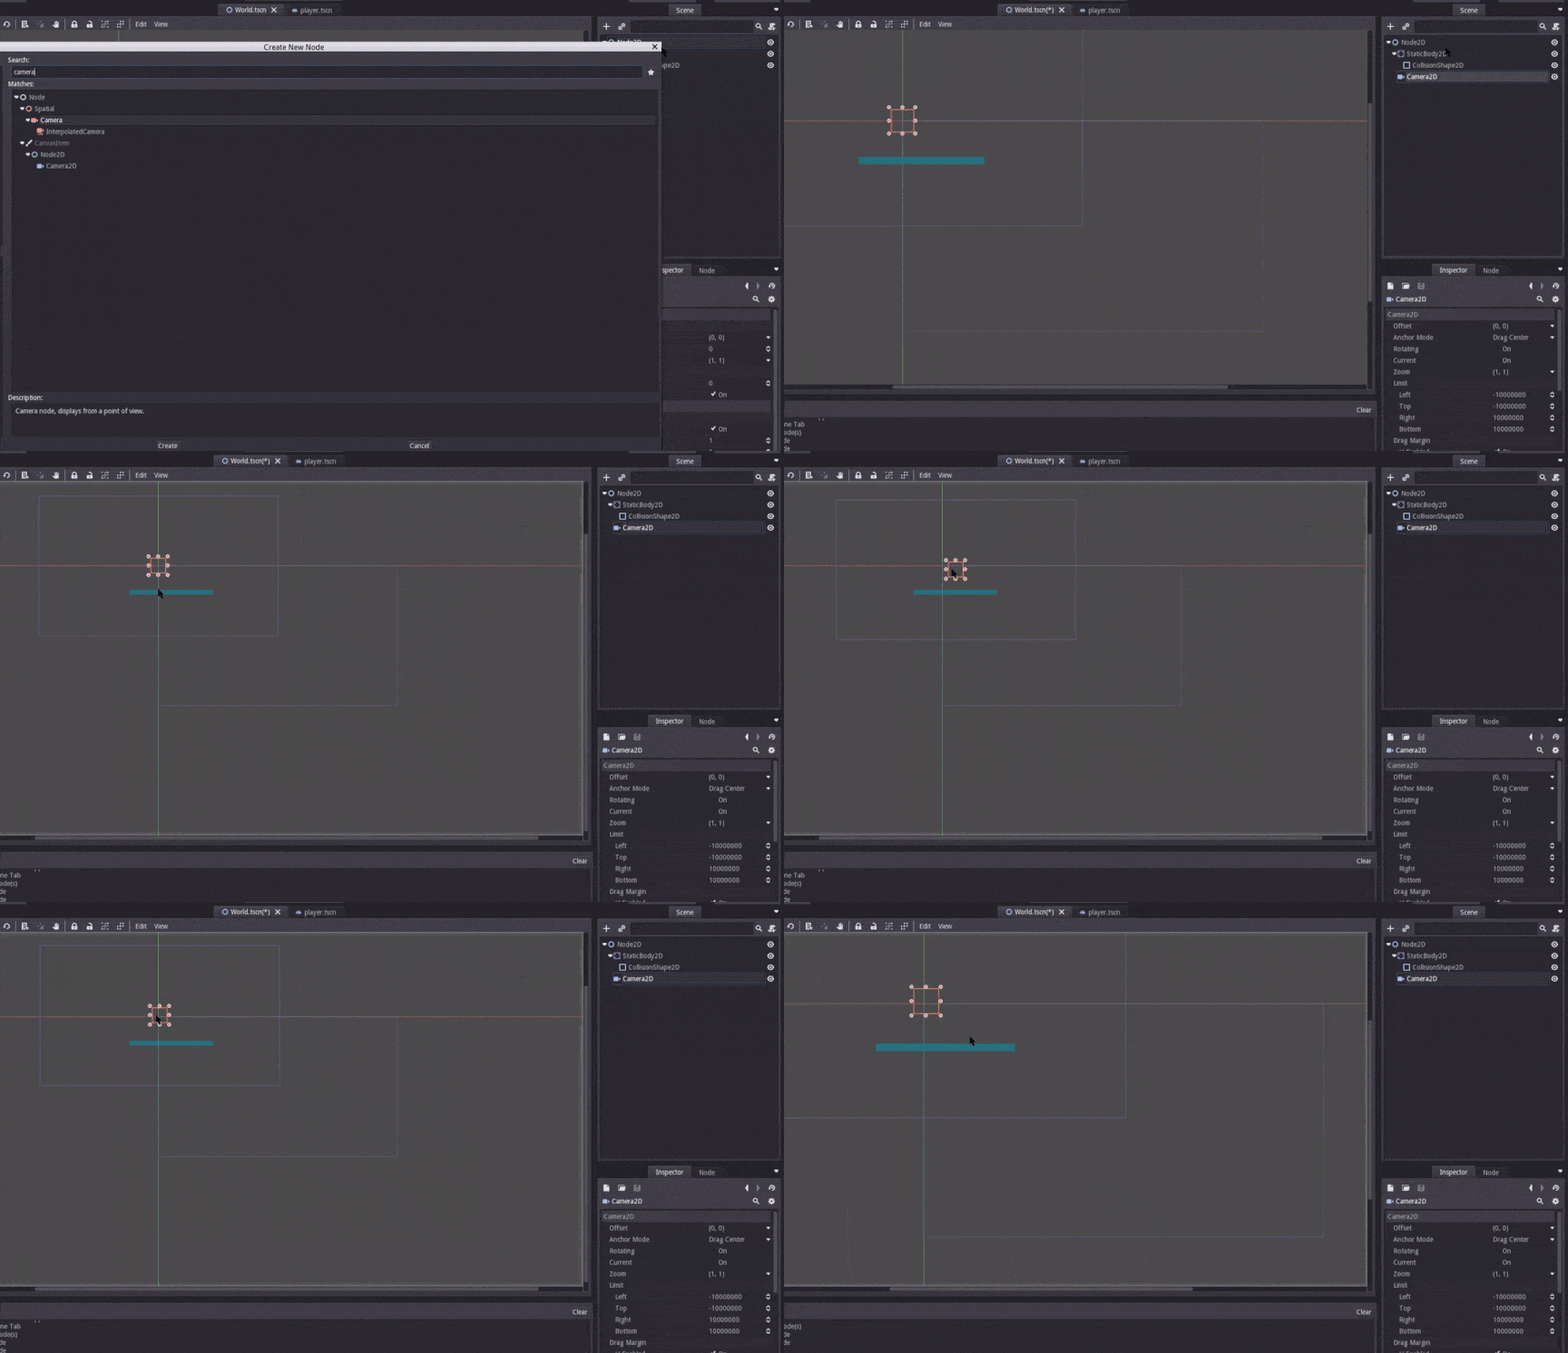
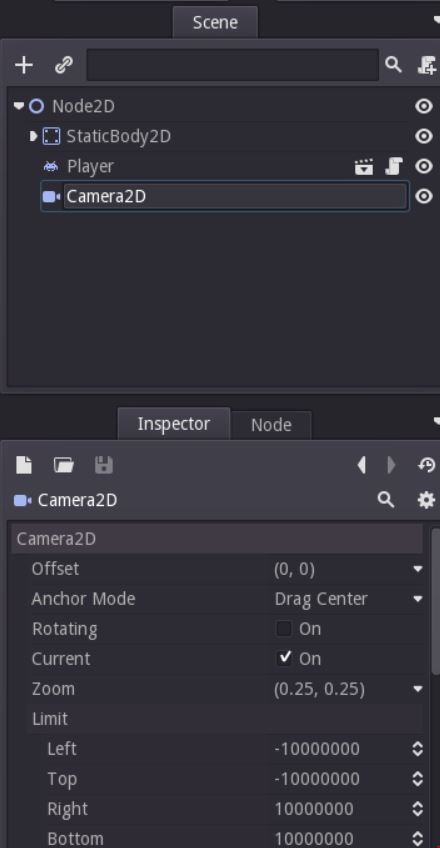
Now add a new Camera2D node as a child of Node2D. Set the Zoom into (0.25, 0.25) and activate the Current option. Camera2D is a projection for 2D scenes, if we don’t use camera, the projection is always set from the (0,0) until the size of the viewport (found at project settings).
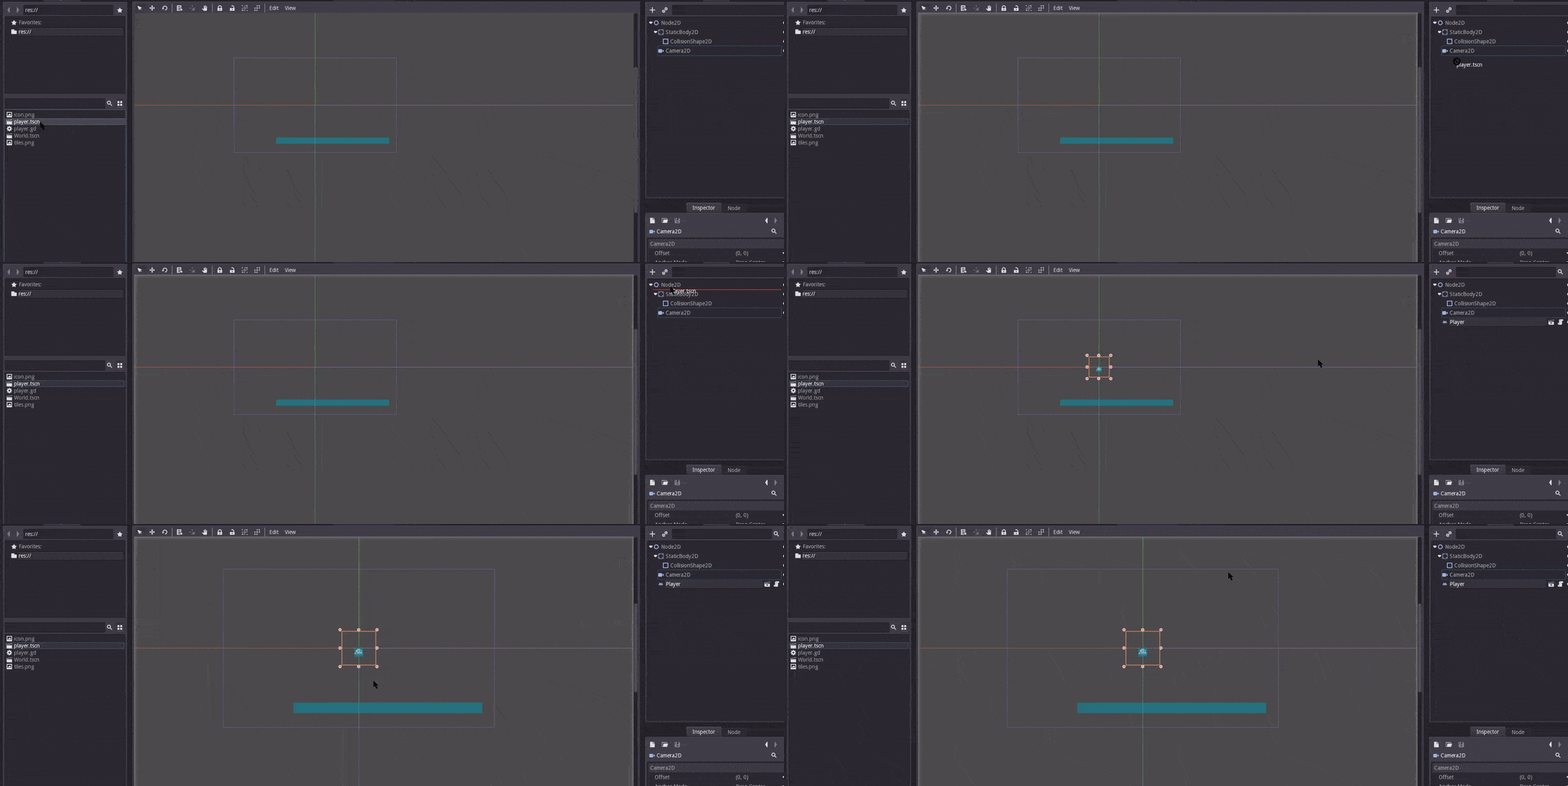
Drag and drop player.tscn from the FileSystem window into Node2D at the Scene Window.
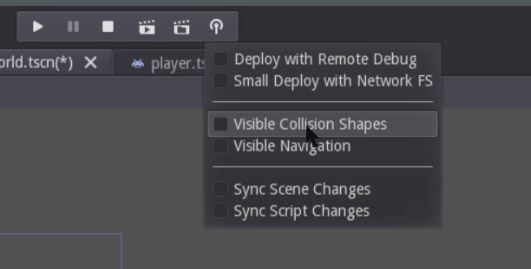
Don’t forget to set active the Visible Collision Shape from the Debug menu (inside of the play menu center top, right corner is the Debug Menu). When the option is set as ON, the collision will visible while play mode.
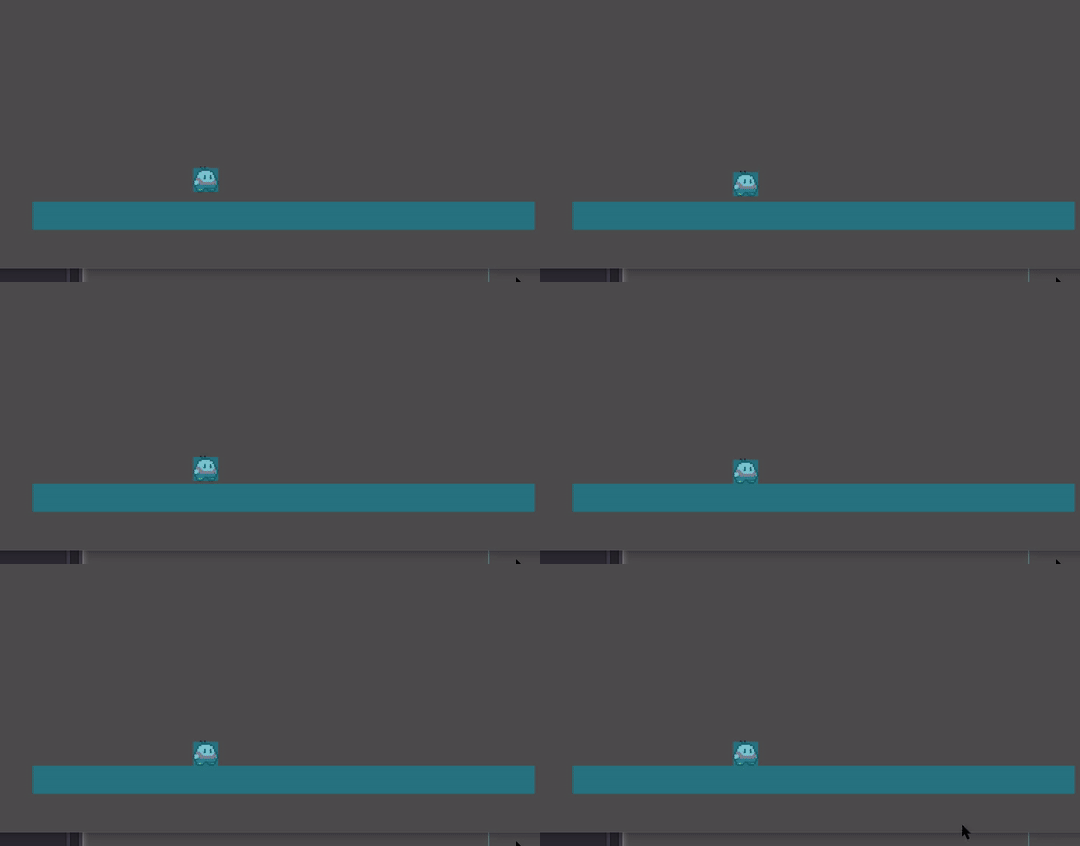
Play it (press F6)
Fixing the gravity
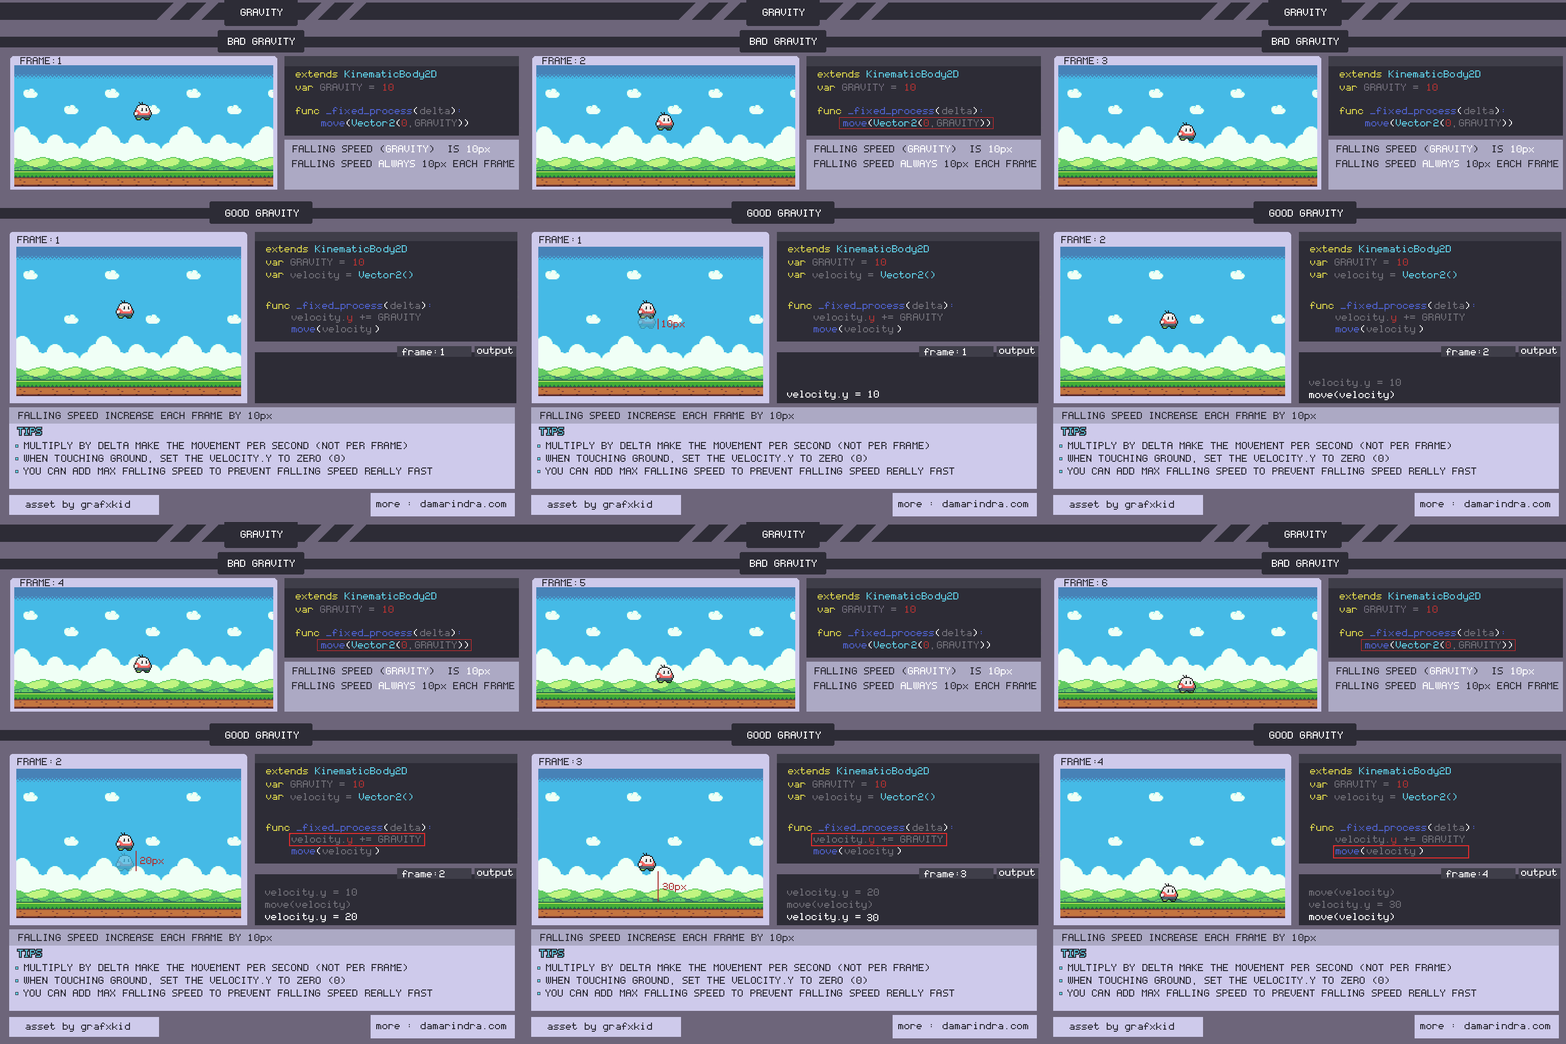
When an object falling down because of gravity, the speed will increase incrementally. To do this, add one more variable to store our velocity
var velocity = Vector2()
And change the old code
|
|
with this one
|
|
So the final code will look like this
|
|
KEEP IN MIND! The concept of gravity is per second, so the character will falling down by 10px per second (incrementally), not per frame. This is why we multiply the GRAVITY by delta. Multiply a number by delta will make anything into per second.
You can try to play it, press F6, the gravity will look good now, the fall speed will increase each frame, not constant like before.
Set Maximum Falling speed
When the character falling down from high ground, the falling speed always increases by gravity and make the character falling really fast. So we need to make the falling speed not more than max falling speed. Create a new variable MAX_FALLING_SPEED, and follow this code
|
|
So when the velocity.y reached the MAX_FALLING_SPEED, then set the velocity.y to MAX_FALLING_SPEED.
Make the player moving
Setup the Input Map
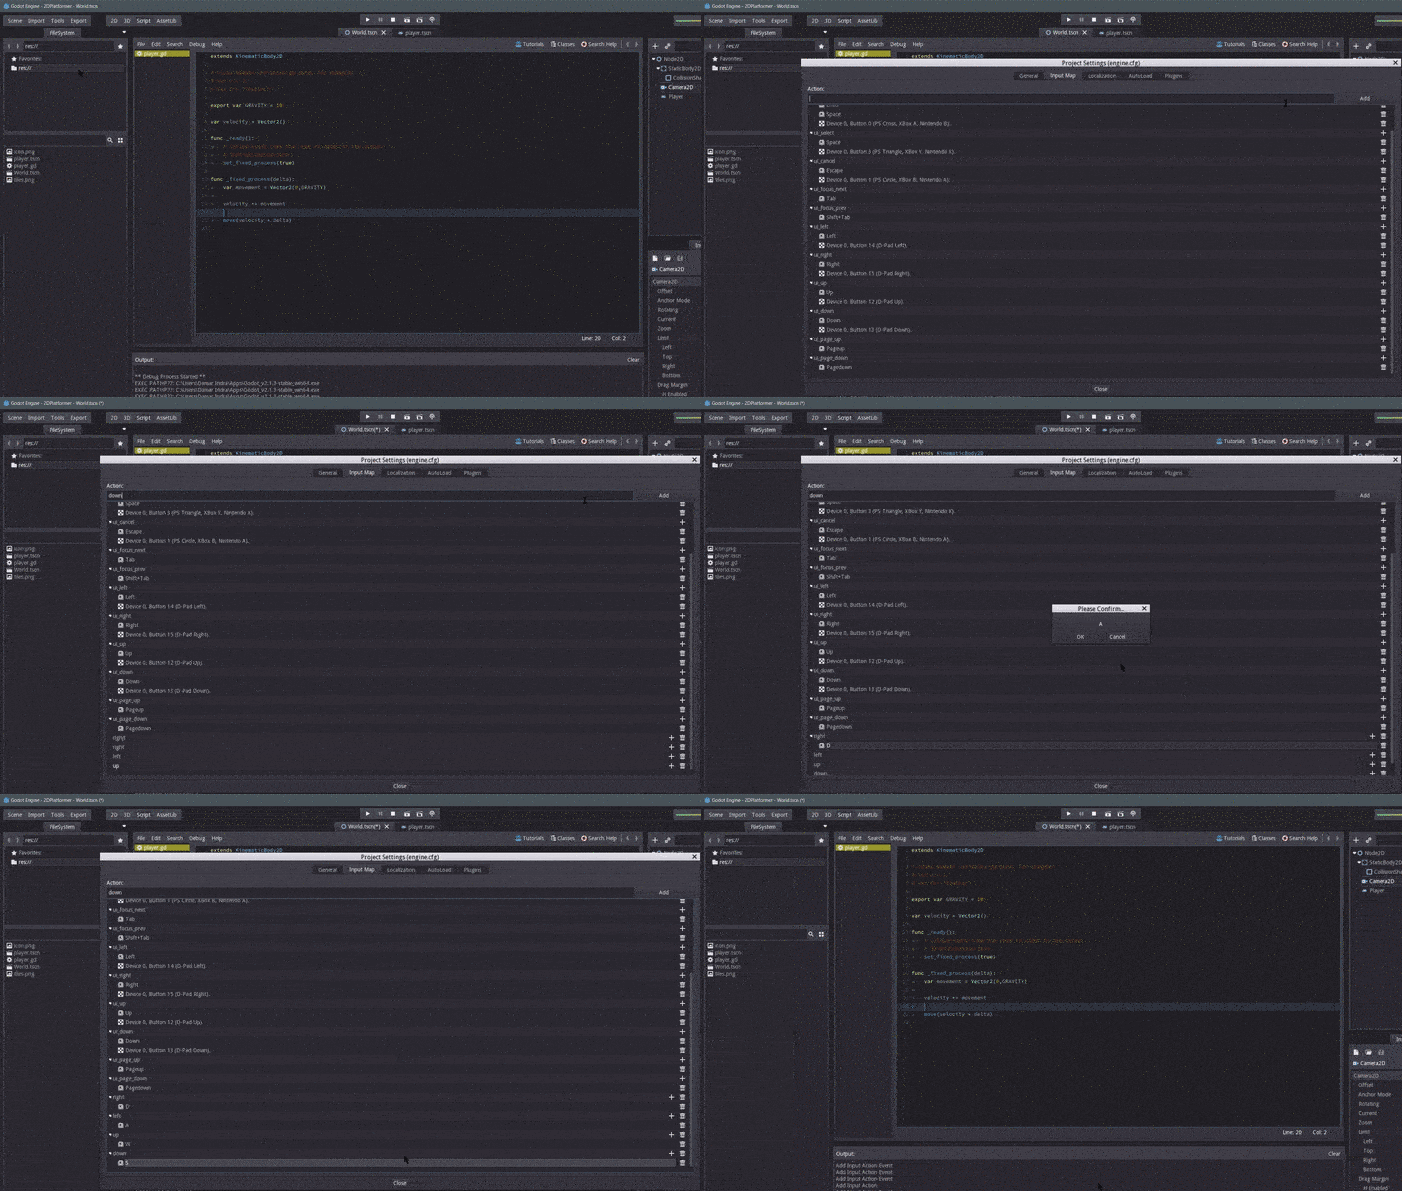
We need to setup our Input Map to define what button we use in the game. For now, I need to define 5 buttons, right, left, up, down, jump. To do this, click Scene - Project Settings - Input Map, add new Action, just write the action name, for example, ‘right’, then click Add button. Re-do this until you have right, left, up, down, jump action. Then, scroll down and navigate your action. Select one of your action, for example, ‘right’ action. Then on the right side, you can find ‘+’ button, click it and select Key, now press ‘D’ key and click OK button. So, we have bound our right action with ‘D’ key. Re-do this step until our all action bound with a key.
- right : D
- left : A
- up : W
- down : S
- jump : Space
Horizontal Movement
Now implement the horizontal movement. First of all, we need to add our Input variable.
|
|
Input.is_action_pressed("right"), the parameter get from the Input Map Action name, If you still remember, we’ve been setup 5 input map right?
Next one, we need to apply our movement velocity. First of all, we need to define the move speed, add one variable with export prefix, so we can edit while in the editor.
export var MOVE_SPEED = 5
Then, we create the movement logic.
|
|
So, if the right action is pressed, set the x axis of movement into = MOVE_SPEED, if the left action is pressed, then set the x axis of movement into = -MOVE_SPEED. Remember, the right direction is positive, left direction is negative.
The final code looks like this
|
|
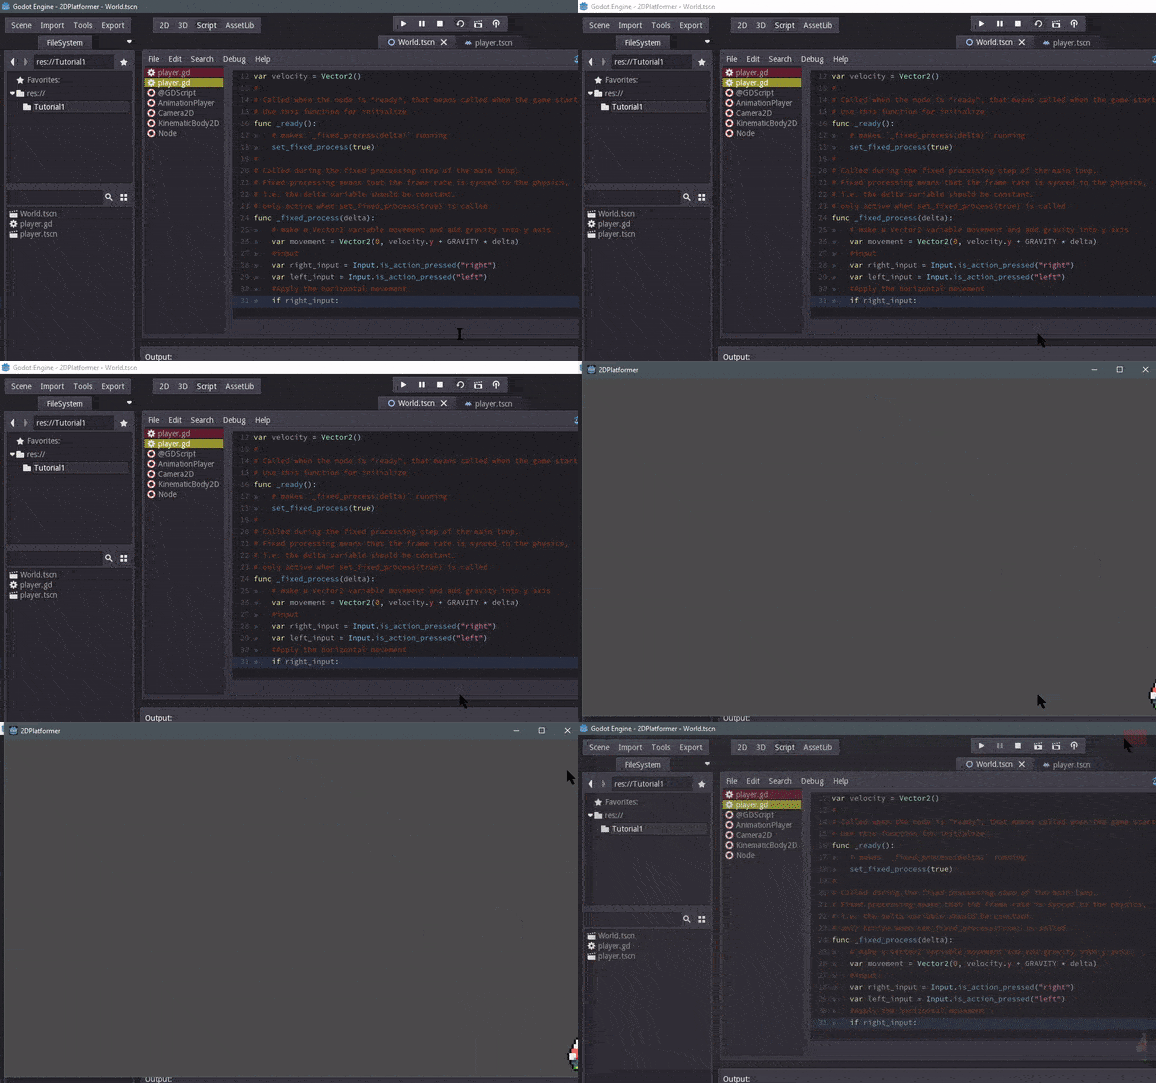
Try to play and press the ‘D’ or ‘A’ key.
Fixing the Horizontal Movement
Did you notice it? While on the air, the movement is fast, and while on the ground, the movement is really slow. Before into that, see the explanation about how the character can moving.
Velocity number is just abstract number, not the real number. Used for explain where the character move!!
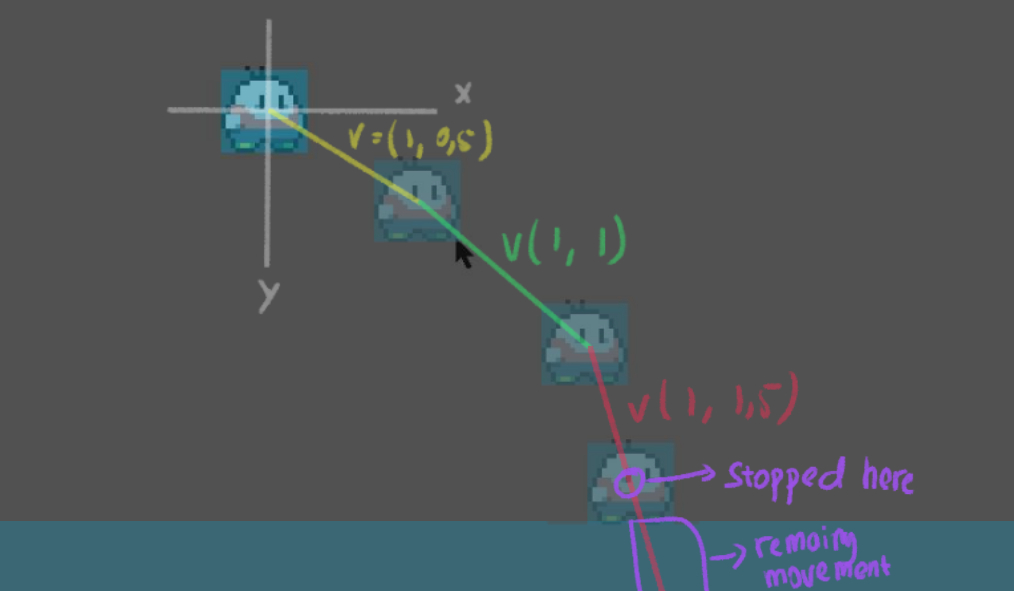
Got it? now this is the explanation why the character really slow while on the ground
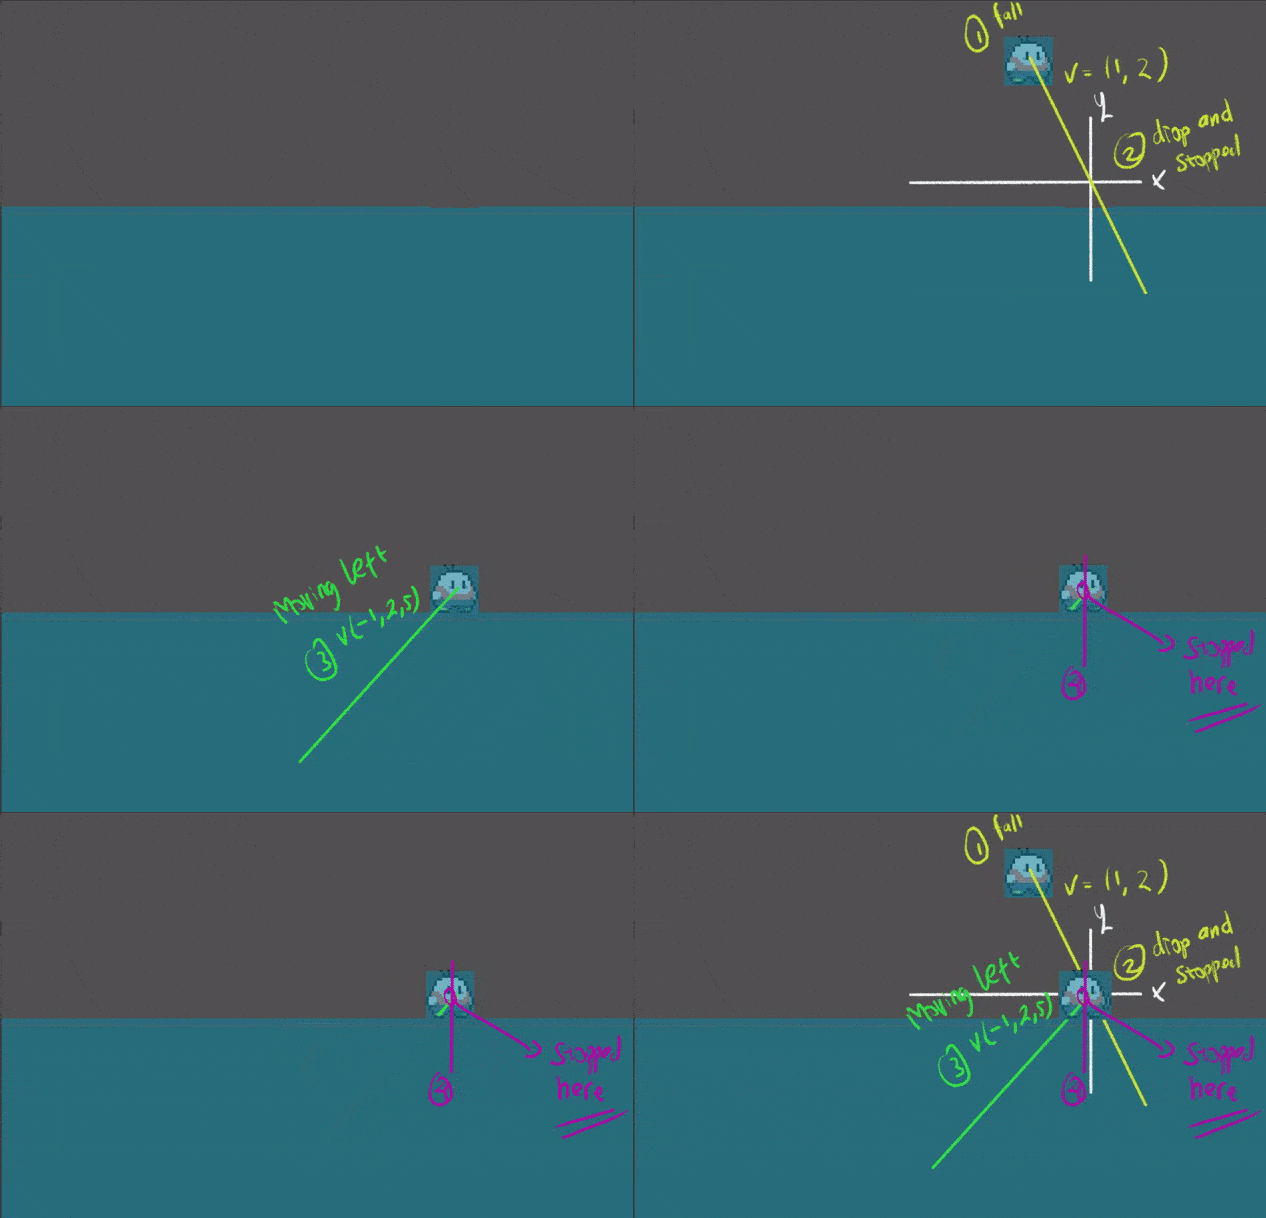
Understand? So the velocity.y is always pushing down, and the result of func move always stopped at where the collision detected, that’s the problem. So how we fix this? See the picture below.
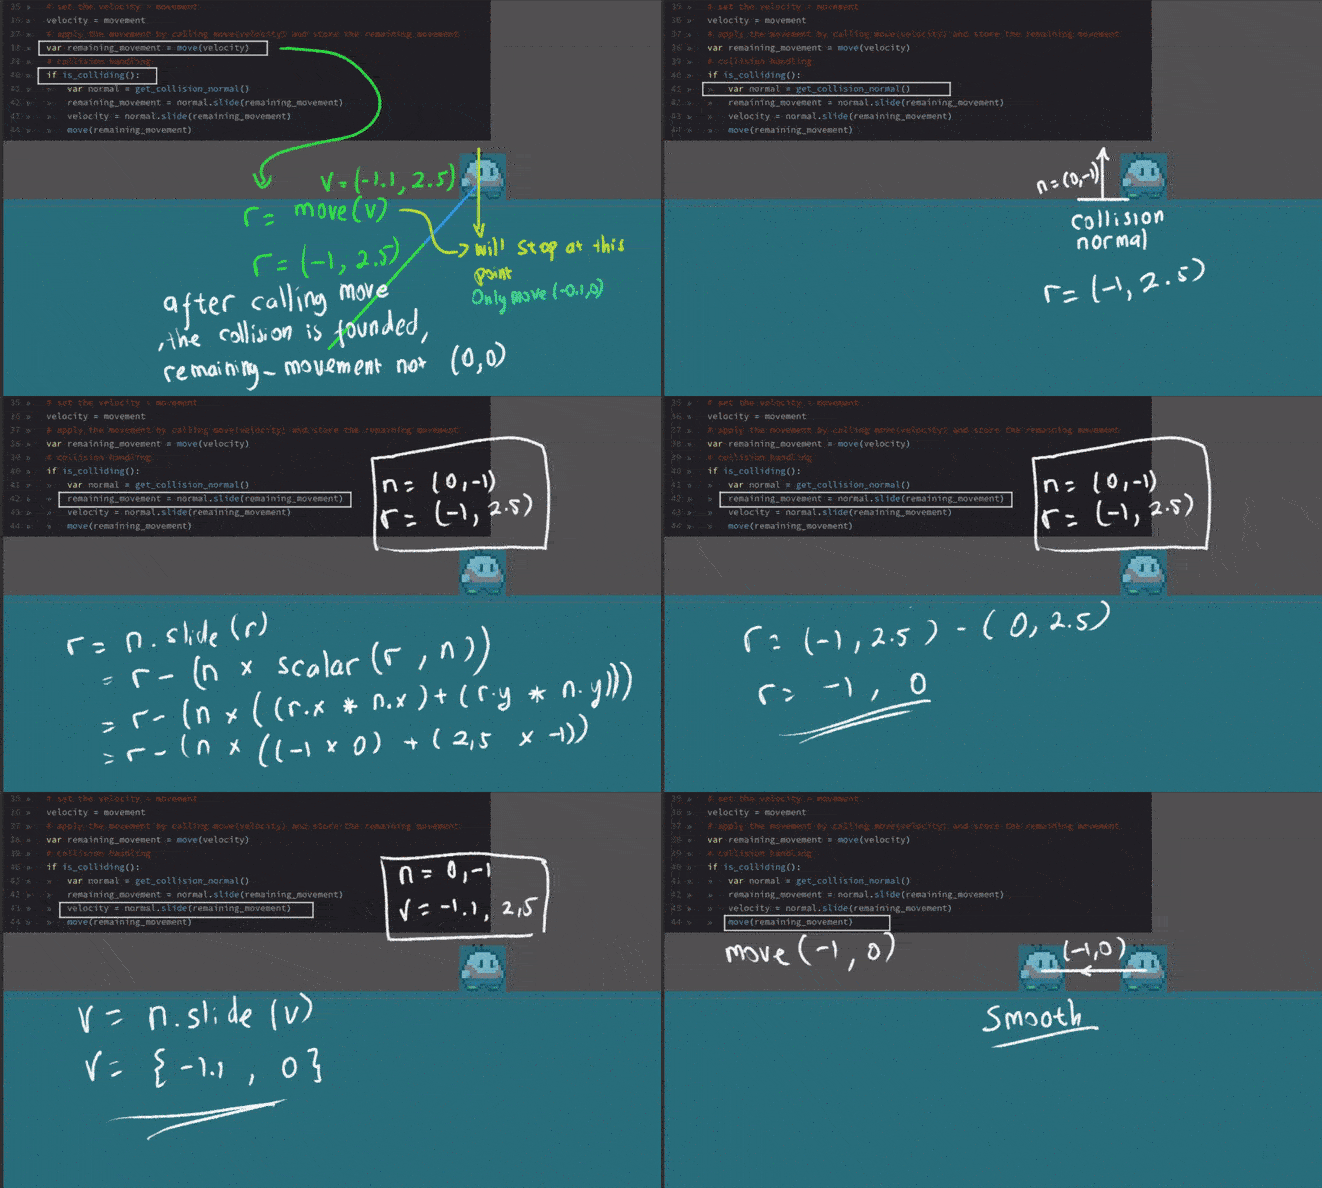
There are so many ways to fix this, but I recommend this one. We can use slide function to fix this, it can handle all collision direction. Formula behind slide function is
V1.slide(V2) = V2 - V1 * scalar(V1, V2) Scalar is same as dot product, read here for more explanation.
Now, implement the code! follow my lead!!
|
|
The final code looks like this
|
|
Test it and see, the result must be like this
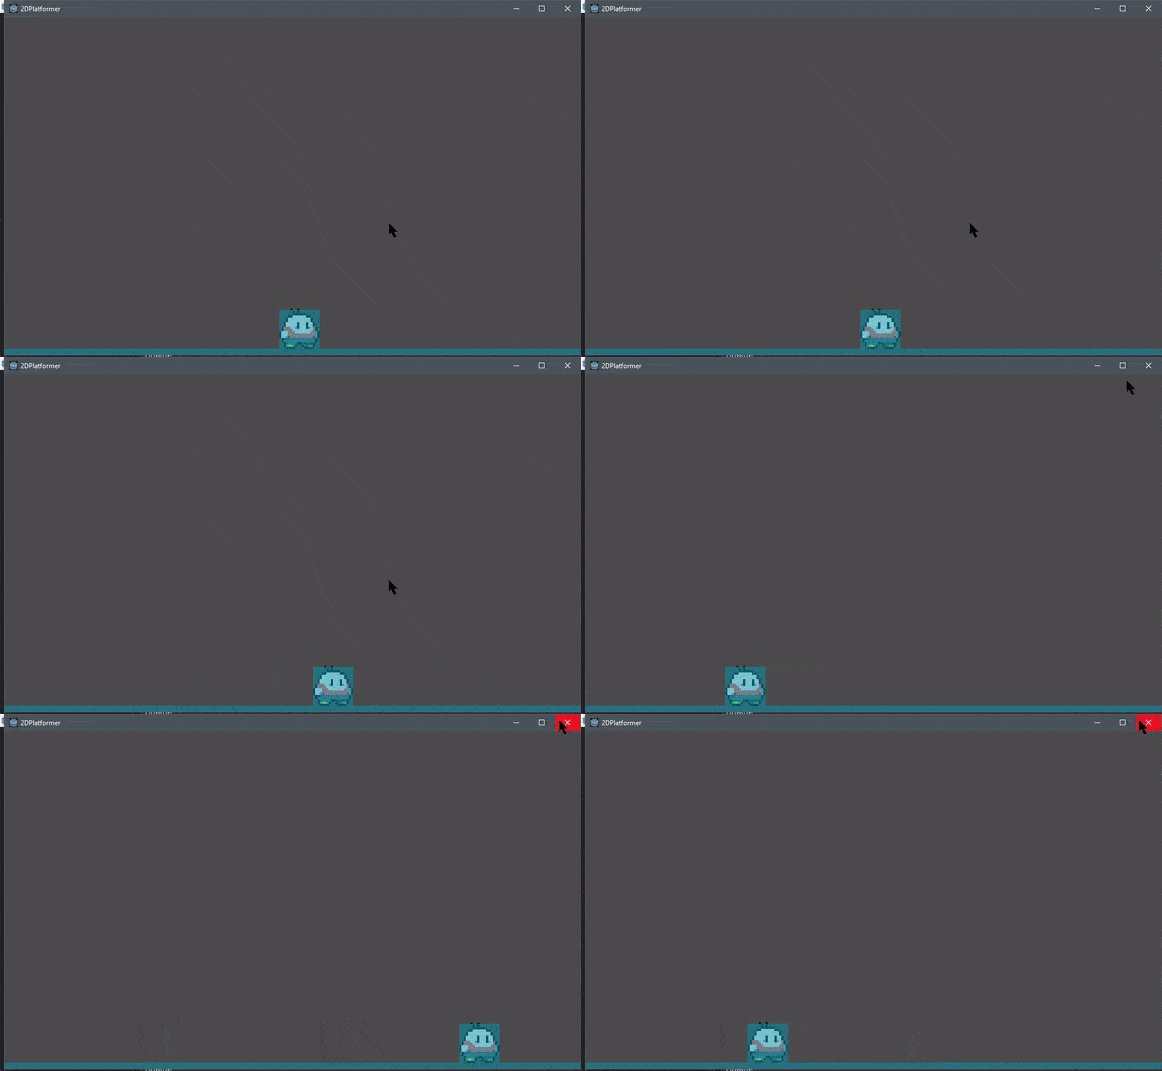
So for today, that was enough. If you still have extra energy, follow this link. All of you are AWESOME!