Player Animation - Platformer Tutorial Part 5 - Godot
This is the fifth part of the tutorial creating platformer game on Godot Engine. In this tutorial I will explain more about character setup, such animation and flipping.
- Part 1 : Preparation
- Part 2 : Player Creation
- Part 3 : Player Creation 2
- Part 4 : Tilemap and Camera
- Part 5 : Player Animation
- Part 6 : Parallax Background and Level Bounds
- Part 7 : Character Controller and Enemy
Player Direction
Before we implement the animation, it will be good if the sprite direction following the character direction. If the character goes to the left direction, the character should be facing the left direction and otherwise. In the previous part, we have created facing_dir, now it’s the time to use it for fixing the sprite direction. Add one new variable onready var sprite = get_node("Sprite") and add one line code at the end of _fixed_process
|
|
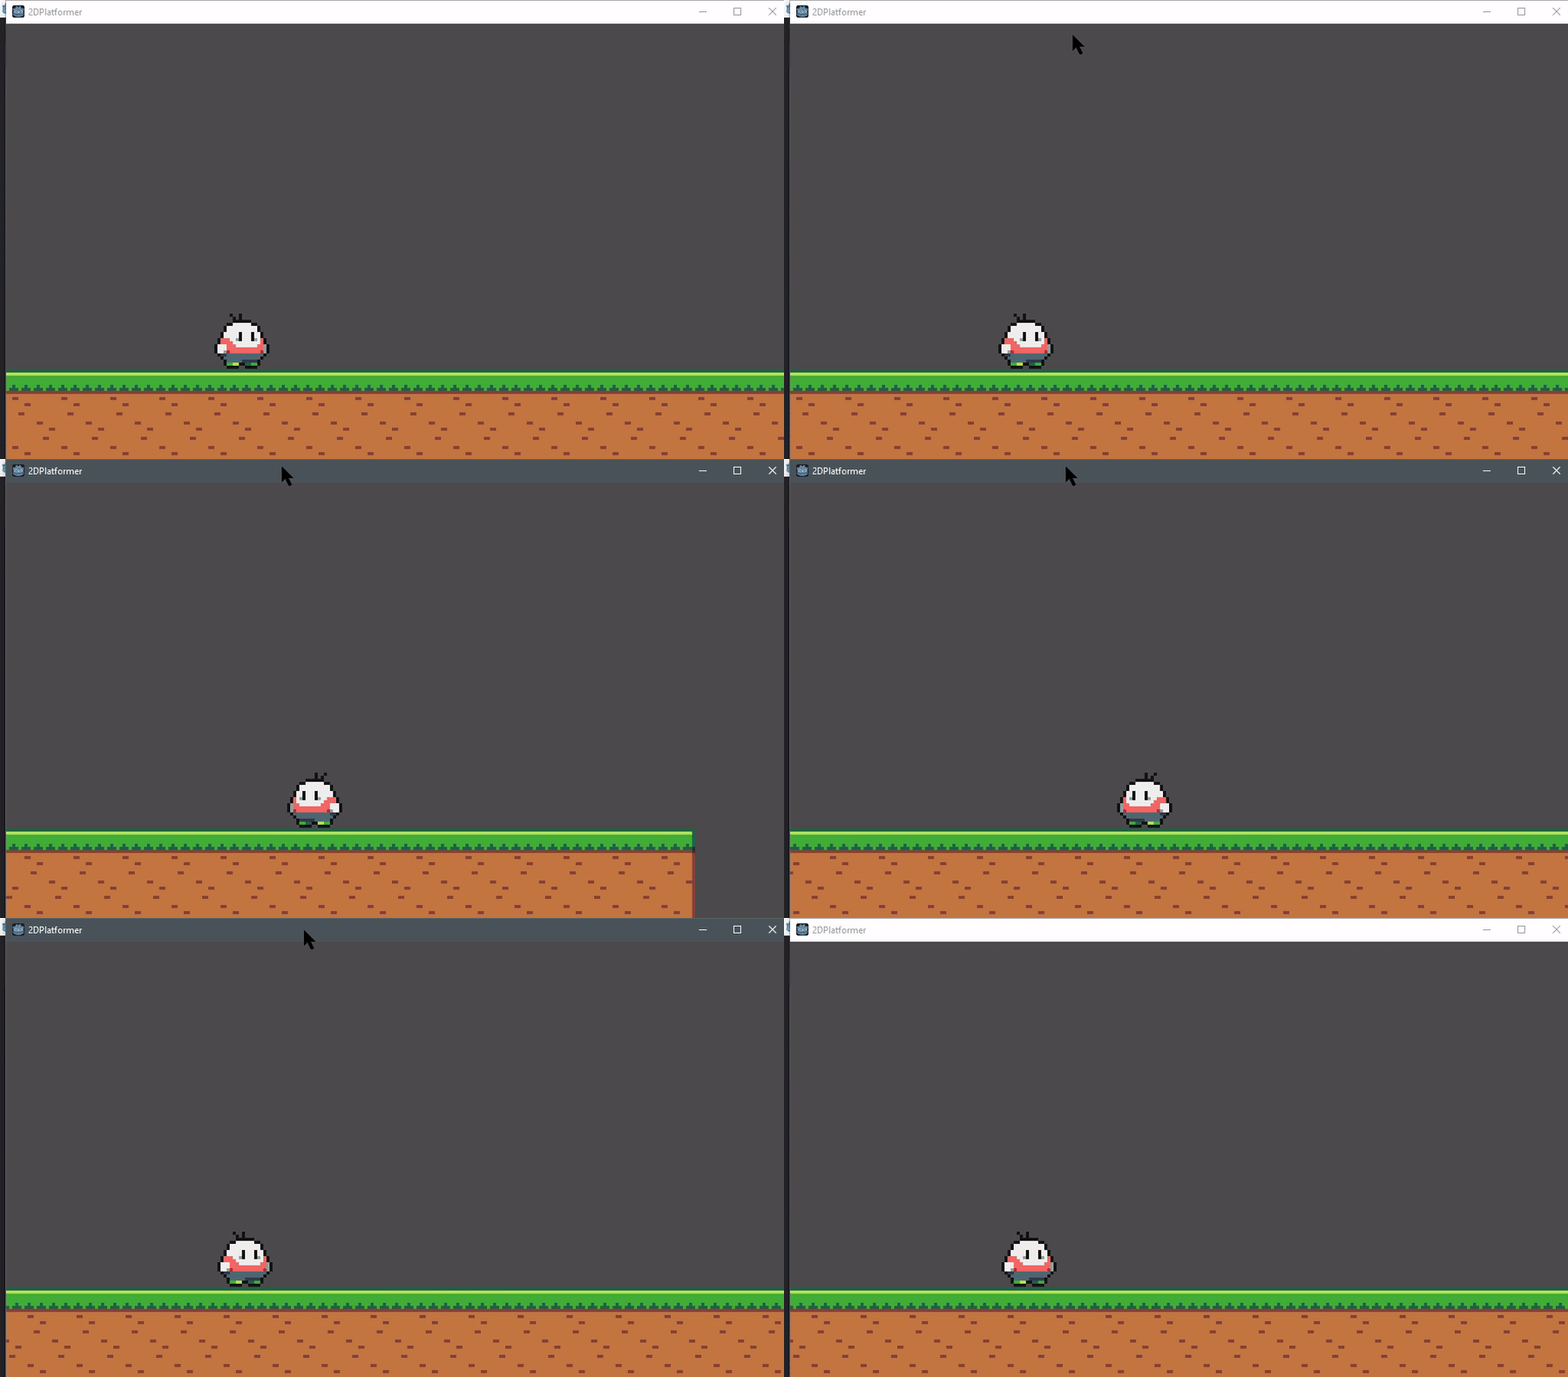
Try it, and see what happens. When facing_dir is not equal than 1, the sprite will be flipping, and otherwise.
Animation
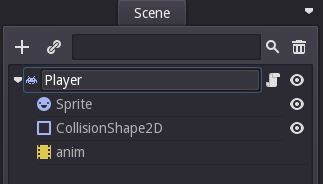
Animation in Godot can be controlled by Animation Player or Animation Tree Player node. What we will use is the Animation Player node, add this node to our player. Open player.tscn and add Animation Player as a child of Player (KinematicBody2D). Then rename it as “anim”.
Idle
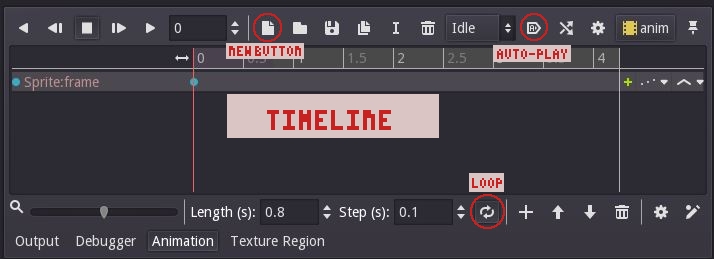
Now, we are ready to animate the sprite. Select the anim node, Animation window will appear automatically at the bottom. Click new button for creating a new animation clip.
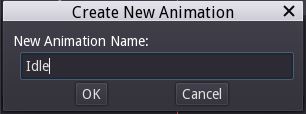
Then, give it a name as ‘Idle’. This clip will be our idle animation.
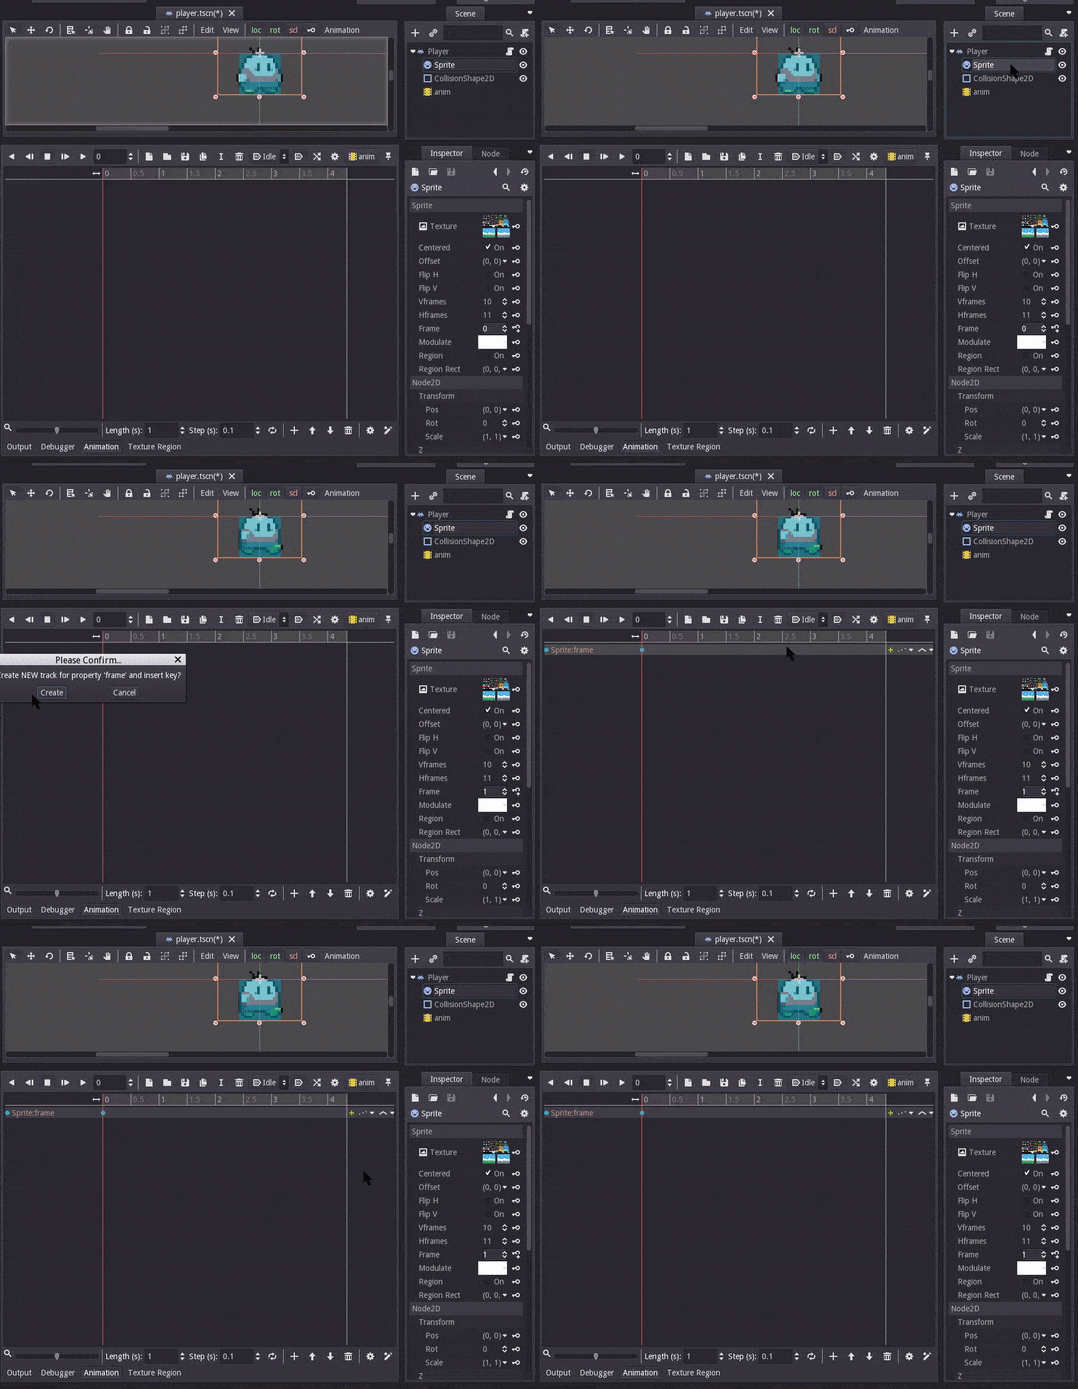
Next, see picture below.

If you come from unity or you understand about animating, this will be not really hard. Idle animation only needs 1 frame. Select the sprite node and see at Inspector. Do you notice it? There is a key button on the right side each option. Find Frame option and make sure the value is 0, then click the key (This action called as keyframe). As I said, idle only need 1 frame, leave it like that. Don’t forget to activate the Auto-play option (The button right after Animation name).
Move
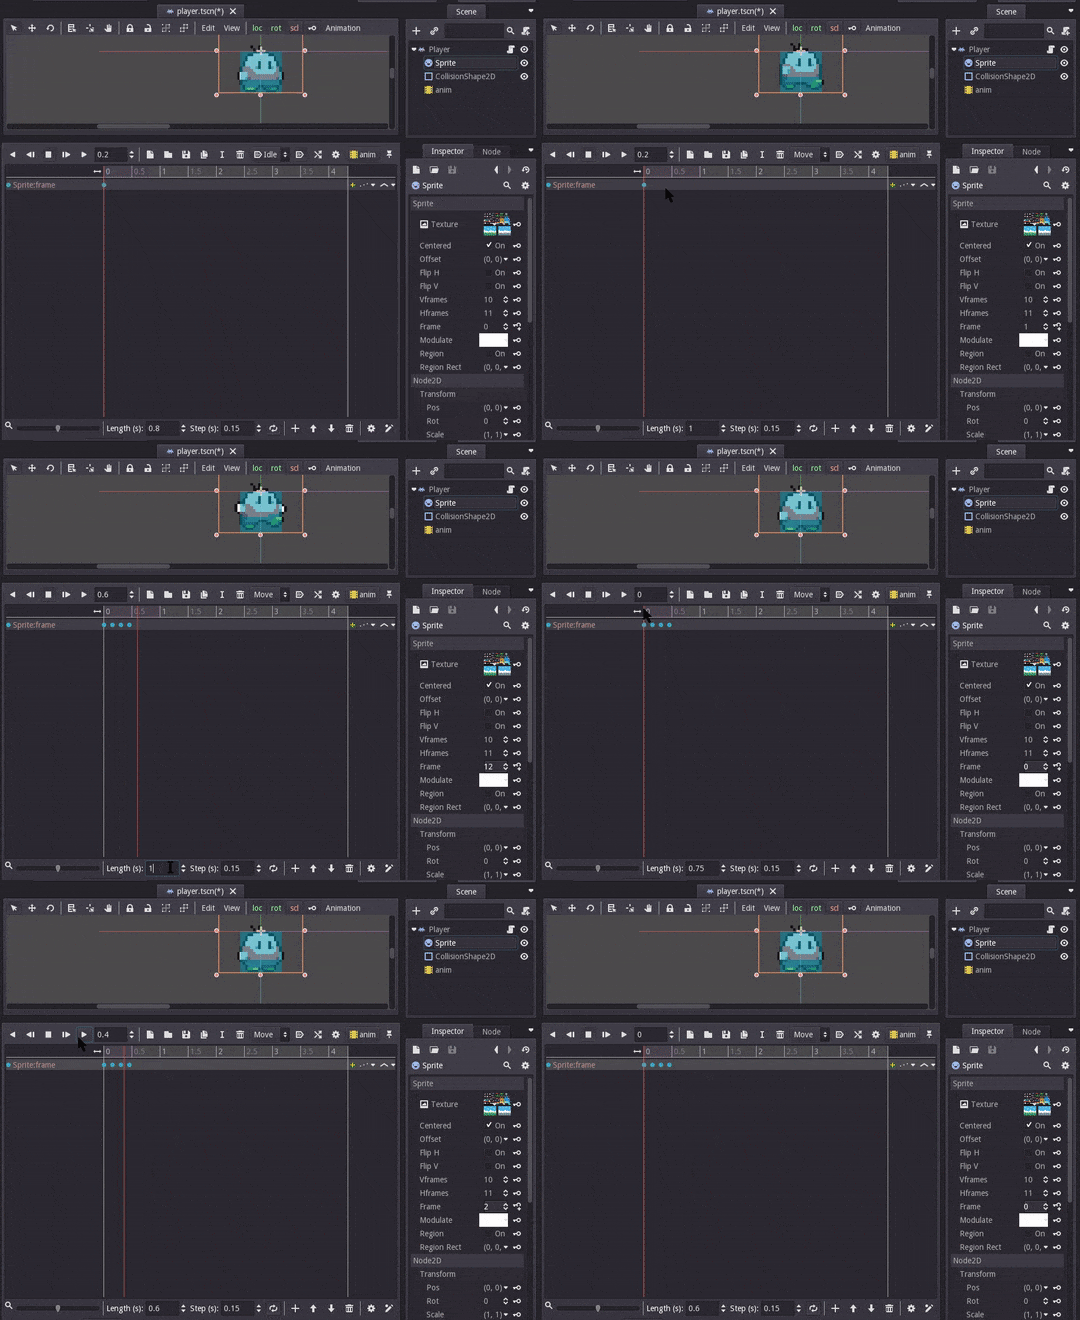
Next, create a new animation clip called ‘Move’. ‘Move’ animation using 4 frames (0, 1, 2, 11), and the frame will change each 0.15 sec, set it into step (step = 0.15). So the length must be 0.75, this value is from total_frame * step. Don’t forget to activate the loop option (The button right after step). Now our job is keyframing, select sprite node again, and keyframing!! See image below how I’ve done it.
Jump
I’m sure I don’t need to explain this over again, the jump is like idle, only need 1 frame, and the index frame is 11. See image below how I’ve done it

Sorry, but explaining how UI works from text is really hard. I think video will be good for this.
Implements the Animation into Code
Add 2 new variable var last_anim = "" and onready var anim = get_node("anim"). Then, add this code at the last line inside of _fixed_process
|
|
TLDR, if grounded and velocity.x not 0, then set move. If velocity.y not 0, then set jump, otherwise just idle.
last_anim store our last frame animation played. new_anim store what animation will be played in the current frame. If the character grounded and velocity is not 0, then new_anim set as Move. If not grounded, then set the new_anim as jump. Then, we need to check if our last frame animation is not equal as new animation, if the condition meets, then play the animation.

This is the full code of player.gd
|
|
Today that is enough, the next part will be Part 6 : Parallax Background and Level Bounds.